| All you need to know about Carpenter's Square-16 |
|---|
 Previous | Index | Next Previous | Index | Next  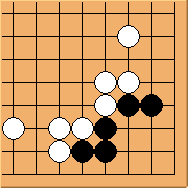 Diagram 16.1: White to play Black is blocked from the bottom side instead. This shape is commonly seen in real games. What can white do? 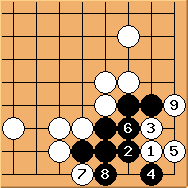 Diagram 16.2: Solution 1
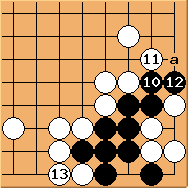 Diagram 16.3: Solution 1 (continued) To continue, 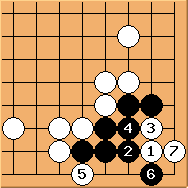 Diagram 16.4: Variation
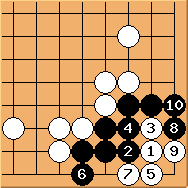 Diagram 16.5: White fails
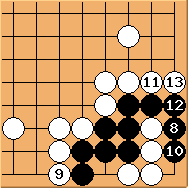 Diagram 16.6: White fails If white plays 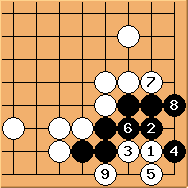 Diagram 16.7: Solution 2
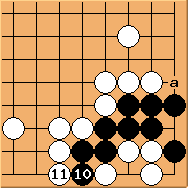 Diagram 16.8: Solution 2 (continued) To continue, this results in a different approach ko (white needs to play 'a' first to make it a direct ko). So which one should black choose? Solution 1 or 2? The difference is very small. However, assume white manages to reach the direct ko stage (getting 'a' in Diagram 16.3 or 16.8), and black eventually wins the ko fight to live in the corner, black would be better off by 2 points if choosing Solution 1 (an easy way to validate this argument is to count the number of cross-sections black would occupy - 18 in Solution 1 and 17 in Solution 2).  Diagram 16.9: Black fails Finally, it is important to remember 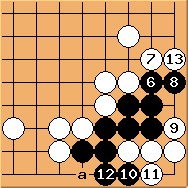 Diagram 16.10: Black fails (continued) Unlike in Diagram 16.5, black is mysteriously short of liberty here.
Conclusion: black corner is not in immediately danger. There are two different ways to form approach ko. I recommend readers to remember the sequence in Diagram 16.2 and 16.3. Previous | Index | Next |
 is absolutely the key point. If black plays
  ,
,
 is good - it forces black to connect at
  and at the same time creates a ko shape.
 is the correct answer.
  is important to avoid a double-ko.
The final result is an approach ko. White has to play 'a' first to make it a direct ko.
is important to avoid a double-ko.
The final result is an approach ko. White has to play 'a' first to make it a direct ko.
 - that would be a direct ko immediately.
  may connect first.
  here, the result is a seki.